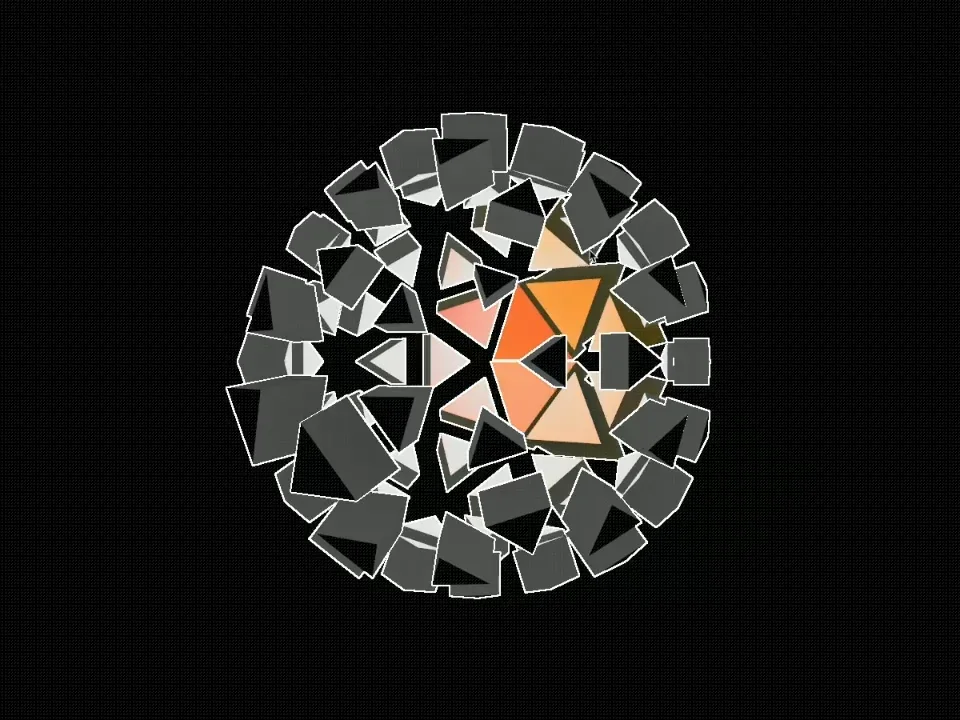
Editor’s note: As we count down to the first Three.js Conference in Paris this September, we’re continuing our celebration of the Three.js community with Francesco Michelini. In this excellent tutorial, Francesco takes us step by step through the process of turning a simple icosahedron into a dynamic, interactive 3D cluster, exploring Three.js, TSL, WebGPU, and three-start along the way.
🎟️ Still no ticket? As part of our partnership with the first Three.js Conference, Codrops readers can use the code CODROPS to get 15% off. Get your ticket →
It’s not unusual for me to find myself on some social media platform looking for inspiration, both for my client projects and potential experiments.
This tutorial exists because of this: an Instagram post I spotted some time ago that eventually became an interactive visualization.
Disclaimer: this tutorial goes straight to the point, so I won’t be covering all of Three.js or any specific bundler setup. I’ll leave that to you!
Destructuring the whole effect
First of all, let’s define what the effect contains:
- A rotating icosahedron whose faces are extruded
- Such faces are scaled up and down (we’ll use a built-in noise function)
- A dithering postprocess effect
That’s all! And the good thing is that 2 of these 3 parts are already bundled into Three.js.
What we will be using
- Three.js
- TSL
- three-start
- GSAP
A note about Three Start
three-start is a brand new library that helps kick off a Three.js project with very few lines of code and manages all the basic things automatically, like the render loop, renderer and camera setup, resize events, and so on.
What I like the most about it is that it allows you to split a Three.js application into modules and components.
A module is a “global feature” that always runs across the entire application; asset loading, physics, input management, all these could be enclosed in a module.
Components, on the other hand, are basically behaviors you can attach to every Object3D.
For instance, you can create a Spin component which accepts an axis and a speed parameter, and on every update lifecycle hook of such component, you can rotate the object on that axis depending on the speed.
Also, you can add this component multiple times in case you need to make the object spin on multiple axes at different speeds.
Enough talk, let’s start building!
Project setup
First, let’s install the packages we need:
$ pnpm add three three-start gsapThen, create the basic HTML:
<!doctype html>
<html lang="en">
  <head>
    <meta charset="UTF-8" />
    <link rel="icon" type="image/svg+xml" href="/favicon.svg" />
    <meta name="viewport" content="width=device-width, initial-scale=1.0" />
    <title>three-start</title>
  </head>
  <body>
    <div id="app"></div>
    <script type="module" src="/src/main.js"></script>
  </body>
</html>
Finally, in out /src/main.js file, bootstrap a basic Three.js scene:
import './style.css';
import * as THREE from "three/webgpu";
import { ThreeStart, ThreeContextEvents } from "three-start";

const starter = new ThreeStart();

starter.mount(document.getElementById("app"));
starter.start();

const { scene, camera } = starter.ctx;

camera.position.z = 4

// Log something on each update just to verify everything is working.
// This can be removed later.
starter.ctx.on(ThreeContextEvents.Update, () => {
  console.log('update')
})
That’s it. Now, if you open the browser, you should see… well… nothing. Only black.
But if you open the console, you should see many update messages. That means everything works!
Adding our base icosahedron
First, let’s create our material in materials/Inner.js just to keep things organized.
import { MeshNormalNodeMaterial, BackSide } from 'three/webgpu'

export const InnerMaterial = new MeshNormalNodeMaterial({
  side: BackSide,
  flatShading: true,
})
Please note: we’re rendering the back faces with side: BackSide on purpose, but we’ll get back to it later. Also, we’re using MeshNormalNodeMaterial only as a temporary solution to check that everything works as expected.
After that, proceed by adding our mesh in main.js.
...

import { InnerMaterial } from "./materials/Inner";

...

const innerGeometry = new THREE.IcosahedronGeometry(1, 1);
const innerMesh = new THREE.Mesh(innerGeometry, InnerMaterial);
scene.add(innerMesh);
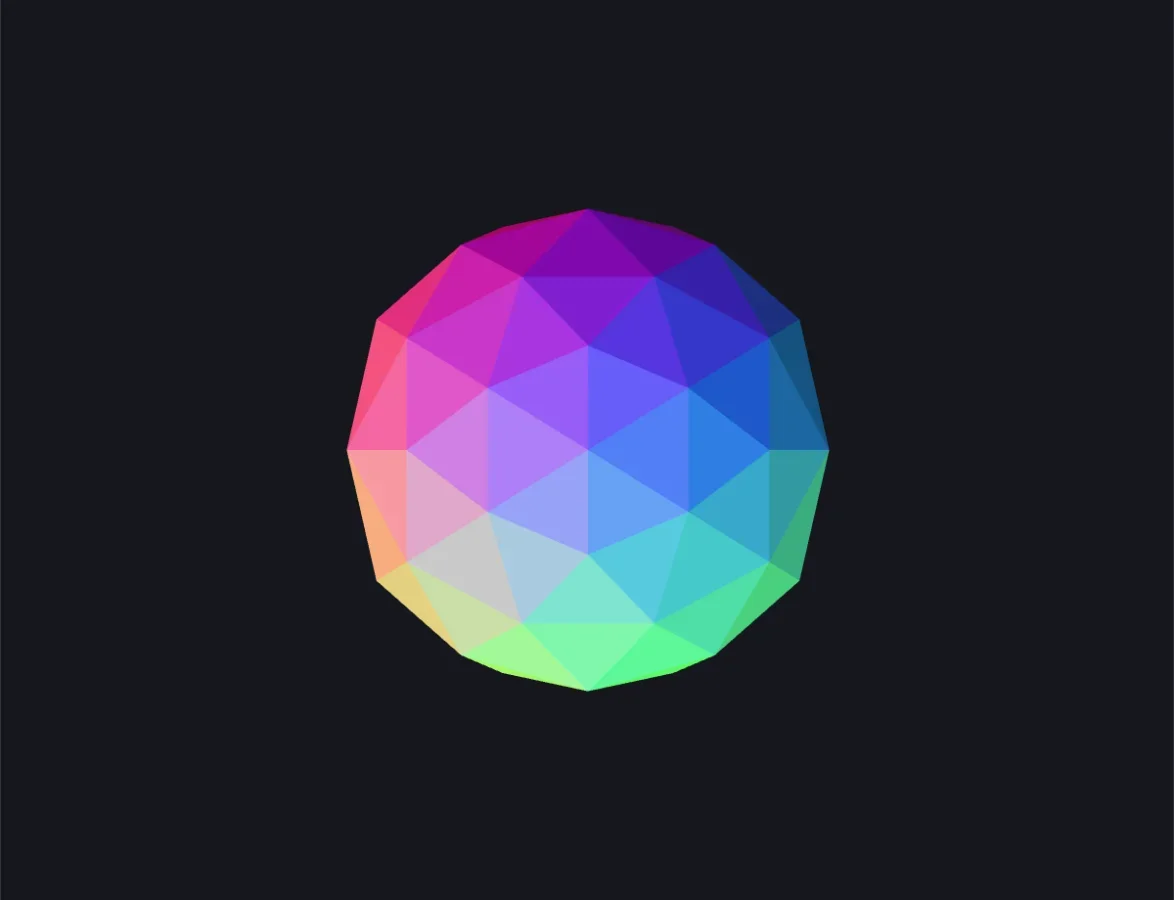
Voilà, here’s our icosahedron:
Before going further, let’s add a Spin behavior using three-start. Let’s declare it in behaviors/Spin.js
import { Object3DBehaviour } from "three-start";

export class Spin extends Object3DBehaviour {
  #initRotY = 0

  speed = 1

  constructor(speed = 1) {
    super()
    this.speed = speed
  }

  onUpdate() {
    // Make the object spin around the y-axis.
    // The rotation is frame indepentent thanks to the usage of the delta time.
    const dt = this.ctx.getDeltaTime()
    this.object.rotation.y += dt * this.speed
  }

  onDestroy() {
    this.object.rotation.y = this.#initRotY
  }
}
As you can see, creating a new behavior is really no big deal: you start by extending the Object3DBehaviour class, and then you can manage everything through each component’s lifecycle hooks.
Finally, add the Spin behavior to the Icosahedron in main.js.
// First, import the new addComponent module from three-start
import { ThreeStart, ThreeContextEvents, addComponent } from "three-start";

...

// Then add it to the mesh.
// In this case, `-0.4` is the `speed` parameter the `Spin` class accepts.
addComponent(innerMesh, Spin, -0.4);
That’s it. If you did everything correctly, you should see the mesh rotating.
Please note: if something visually feels “off”, that’s totally normal because we’re rendering the inner faces of the mesh.
Creating the faces
This is where the fun begins. Let’s now create all the faces. We’ll use a BatchedMesh for this purpose.
First, here’s the material we’re going to use.
// materials/Cluster.js
import { MeshNormalNodeMaterial } from 'three/webgpu'

export const ClusterMaterial = new MeshNormalNodeMaterial()
Then, the actual mesh:
// main.js

import { ClusterMaterial } from './materials/Cluster'

...

function createExtrudedFaces(mesh) {
  if (!mesh) return console.error('Mesh is required')

  const { geometry } = mesh
  const { position: meshPosition } = mesh
  const positionAttribute = geometry.getAttribute('position')
  const { length: numVertices } = positionAttribute.array
  const faceCentroid = new THREE.Vector3()
  const faceDirection = new THREE.Vector3()
  const instanceMatrix = new THREE.Matrix4()

  // We need to count how many faces the base mesh has.
  // We can calculate it by dividing the number of vertices by the number of vertices per face.
  // Each face has 3 vertices, and each vertex has 3 components (x, y, z), so we divide by 9.
  const numFaces = numVertices / 9

  // Create the batched mesh
  const facesMesh = new THREE.BatchedMesh(
    numFaces,
    numVertices * 6,
    numVertices * 6,
    ClusterMaterial,
  )

  // Iterate over the vertices of the base mesh; 9, so 1 face, per loop iteration.
  // For each loop iteration, we need to create a new instance geometry.
  // The instance geometry will be a triangle with the same vertices as the base mesh.
  let i
  for (i = 0; i < numVertices; i += 9) {
    // Get the vertices of the face.
    const x1 = positionAttribute.array[i + 0]
    const y1 = positionAttribute.array[i + 1]
    const z1 = positionAttribute.array[i + 2]

    const x2 = positionAttribute.array[i + 3]
    const y2 = positionAttribute.array[i + 4]
    const z2 = positionAttribute.array[i + 5]

    const x3 = positionAttribute.array[i + 6]
    const y3 = positionAttribute.array[i + 7]
    const z3 = positionAttribute.array[i + 8]

    // Calculate the centroid
    faceCentroid.set(x1 + x2 + x3, y1 + y2 + y3, z1 + z2 + z3).divideScalar(3)

    // Calculate the normal of the face by subtracting the centroid from the mesh position and normalizing the result.
    faceDirection.copy(faceCentroid).sub(meshPosition).normalize()

    // Create the instance geometry.
    const instanceGeometry = new THREE.BufferGeometry()

    // Create the `position` attribute array for the instance geometry.
    const attributeArray = new Float32Array([
      x1, y1, z1,
      x2, y2, z2,
      x3, y3, z3,
    ])
    const posAttribute = new THREE.Float32BufferAttribute(attributeArray, 3)
    instanceGeometry.setAttribute('position', posAttribute)

    // Translate the instance geometry back to the centroid.
    instanceGeometry.translate(-faceCentroid.x, -faceCentroid.y, -faceCentroid.z)

    // Compute the vertex normals for the instance geometry.
    instanceGeometry.computeVertexNormals()

    // Add the instance geometry to the faces mesh.
    const instanceGeometryID = facesMesh.addGeometry(instanceGeometry)
    const instanceID = facesMesh.addInstance(instanceGeometryID)

    // Set the matrix of the instance.
    instanceMatrix.makeTranslation(faceCentroid.x, faceCentroid.y, faceCentroid.z)
    facesMesh.setMatrixAt(instanceID, instanceMatrix)
   }

  innerMesh.add(facesMesh)
}

createExtrudedFaces(innerMesh)
The code is well commented, but here are the highlights:
- Create a new
BatchedMesh. - Loop through all the vertices, 9 per iteration since each face is made up of 3 vertices. On each iteration, get all the vertices and construct a new
BufferGeometry. - Compute the normals for each geometry.
- Add the geometry to the previously created
BatchedMesh. - Once that’s done, add the
BatchedMeshto the main mesh.
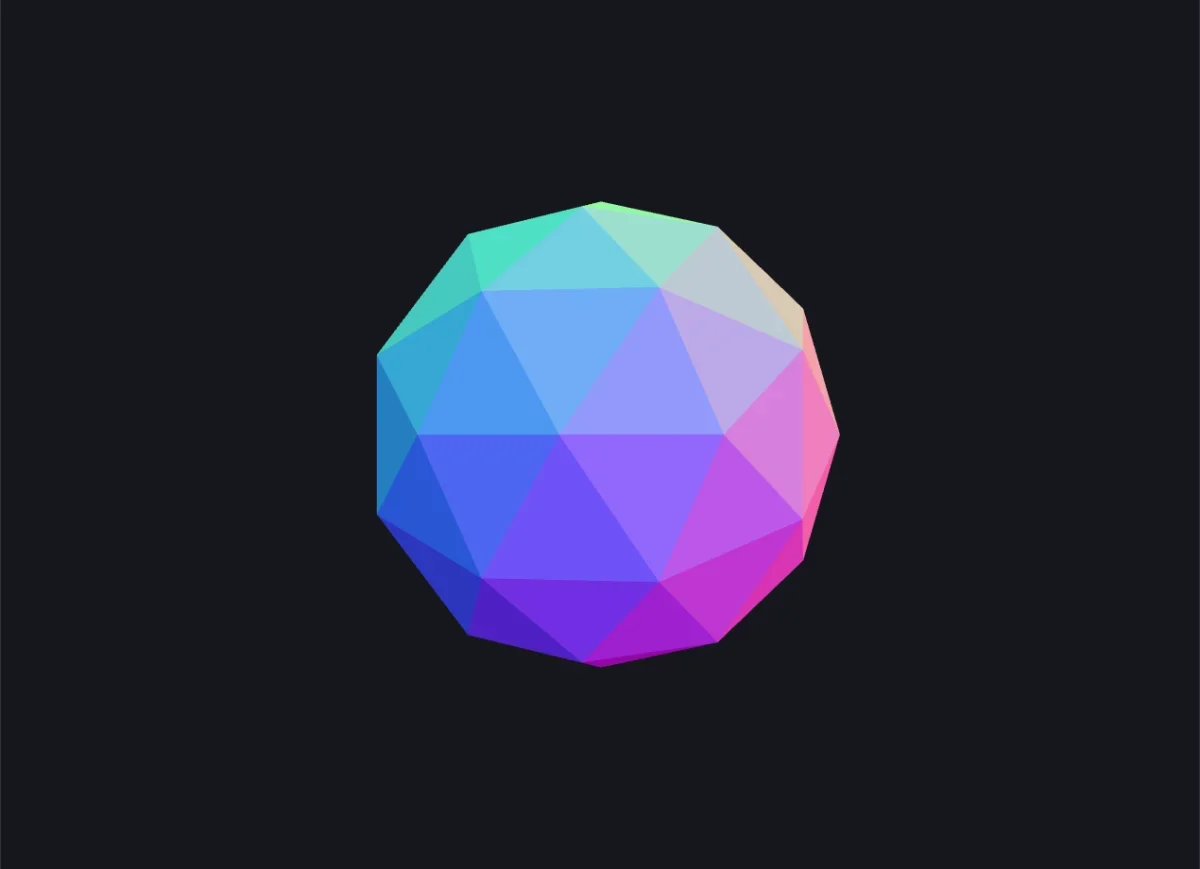
Here’s how it looks now:
… and extruding them
Unfortunately, Three.js doesn’t offer a way to extrude a face out of the box, so we’ll have to do this manually.
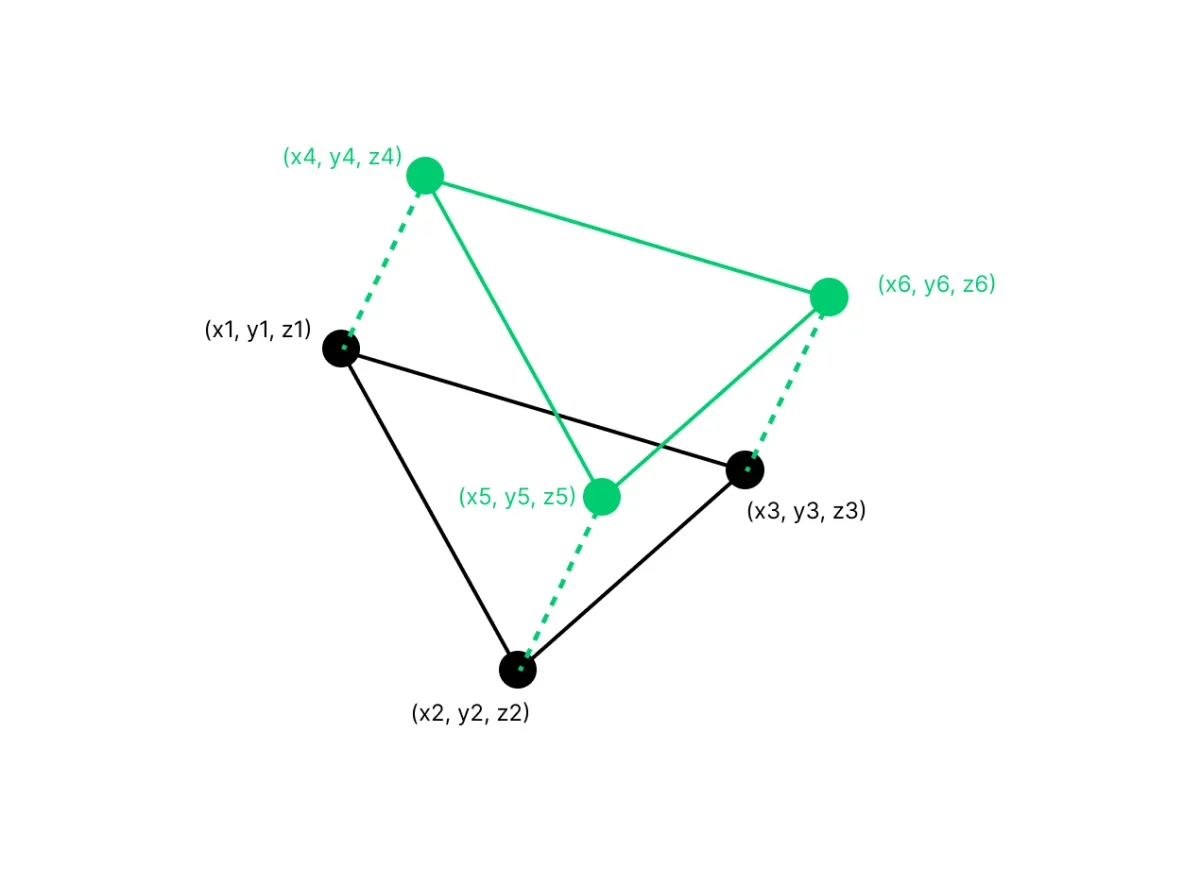
In the last step, we created a new BufferGeometry for each face, so we’re going to extend this step by simply adding more vertices to these geometries, translating them outward along the faceDirection vector.
In the last step, we defined 3 vertices.
x1, y1, z1x2, y2, z2x3, y3, z3
So, starting from these three vertices we will create three additional vertices:
x4, y4, z4x5, y5, z5x6, y6, z6
…but we will extrude them a bit. If it’s not clear, a picture is worth a thousand words:
...

// Create the additional vertices in `createExtrudedFaces()`
const faceExtrusion = 0.45

const x4 = x1 + faceDirection.x * faceExtrusion
const y4 = y1 + faceDirection.y * faceExtrusion
const z4 = z1 + faceDirection.z * faceExtrusion

const x5 = x2 + faceDirection.x * faceExtrusion
const y5 = y2 + faceDirection.y * faceExtrusion
const z5 = z2 + faceDirection.z * faceExtrusion

const x6 = x3 + faceDirection.x * faceExtrusion
const y6 = y3 + faceDirection.y * faceExtrusion
const z6 = z3 + faceDirection.z * faceExtrusion

...

// Refactor the `attributeArray`constant like this
const attributeArray = new Float32Array([
  x1, y1, z1,
  x2, y2, z2,
  x3, y3, z3,

  x1, y1, z1,
  x2, y2, z2,
  x4, y4, z4,

  x2, y2, z2,
  x5, y5, z5,
  x4, y4, z4,

  x2, y2, z2,
  x3, y3, z3,
  x5, y5, z5,

  x3, y3, z3,
  x6, y6, z6,
  x5, y5, z5,

  x3, y3, z3,
  x1, y1, z1,
  x6, y6, z6,

  x1, y1, z1,
  x4, y4, z4,
  x6, y6, z6,

  x4, y4, z4,
  x5, y5, z5,
  x6, y6, z6,
])
Now, here’s the result:
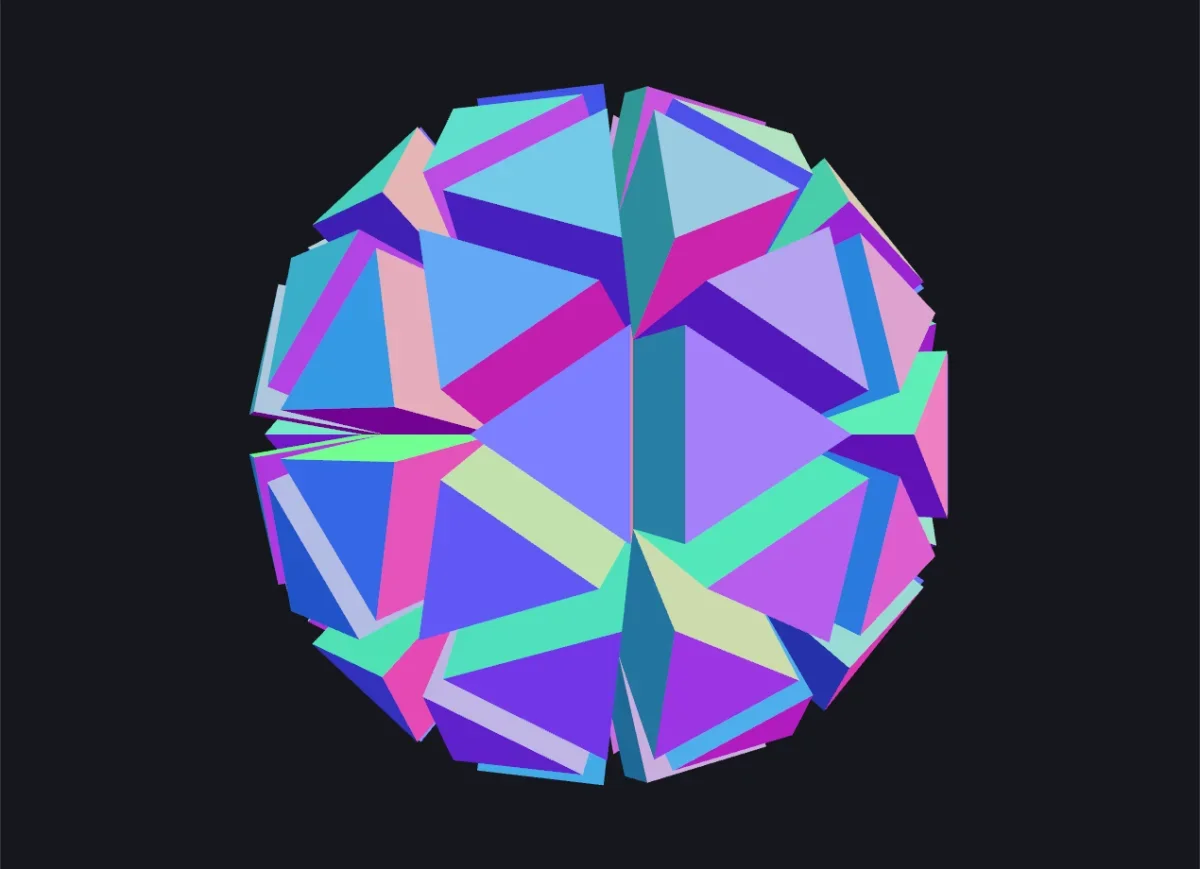
Having those 6 vertices we were able to construct each triangle that construct each instance of out BatchedMesh.
Good! Now everything is in place (almost) . Let’s focus on the visual part.
Animate the instances with noise
Now, move to materials/Cluster.js and edit it this way:
import { MeshNormalNodeMaterial } from 'three/webgpu'
import { attribute, positionLocal, Fn, float, mx_noise_float, time } from 'three/tsl'

export const ClusterMaterial = new MeshNormalNodeMaterial()

const scaleMin = float(0.15)
const scaleMax = float(0.75)
const centered = attribute('position', 'vec3')
const centroid = positionLocal.sub(centered)

ClusterMaterial.positionNode = Fn(() => {
  const t = time.mul(0.5)

  const noise = mx_noise_float(centroid.yz.add(t))
  noise.remapAssign(-1, 1, scaleMin, scaleMax)

  return centroid.add(centered.mul(noise))
})()
Here we’re generating a noise value using the centroid of each instance plus the time as the seed value. This noise value, which goes from -1 to 1 by default, is then remapped to the 0.15 - 0.75 range, giving this organic movement.
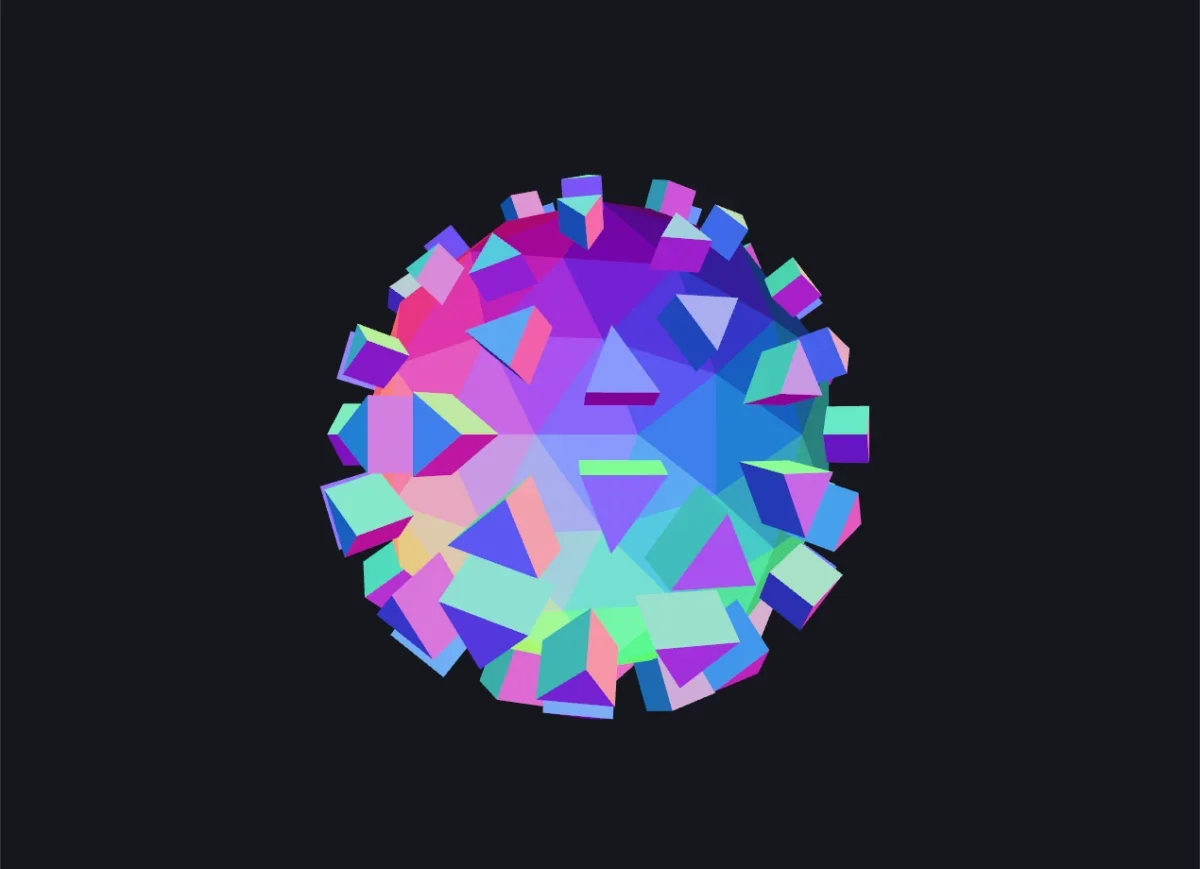
Before working on colors
First of all, we can hide the inner mesh by updating the InnerMaterial:
import { MeshNormalNodeMaterial, BackSide } from 'three/webgpu'

export const InnerMaterial = new MeshNormalNodeMaterial({
  side: BackSide,
  flatShading: true,
  colorWrite: false, // Add this ...
  depthWrite: false, // ... and this
})
We set colorWrite: false because we don’t want the mesh to be drawn on the scene BUT we still need it in the scene for the final part of the tutorial, so this is the most optimal way.
Also, depthWrite: false is needed because otherwise you will see many glitches on the back side of the mesh due to z-fighintg.
Here what the scene looks like now:
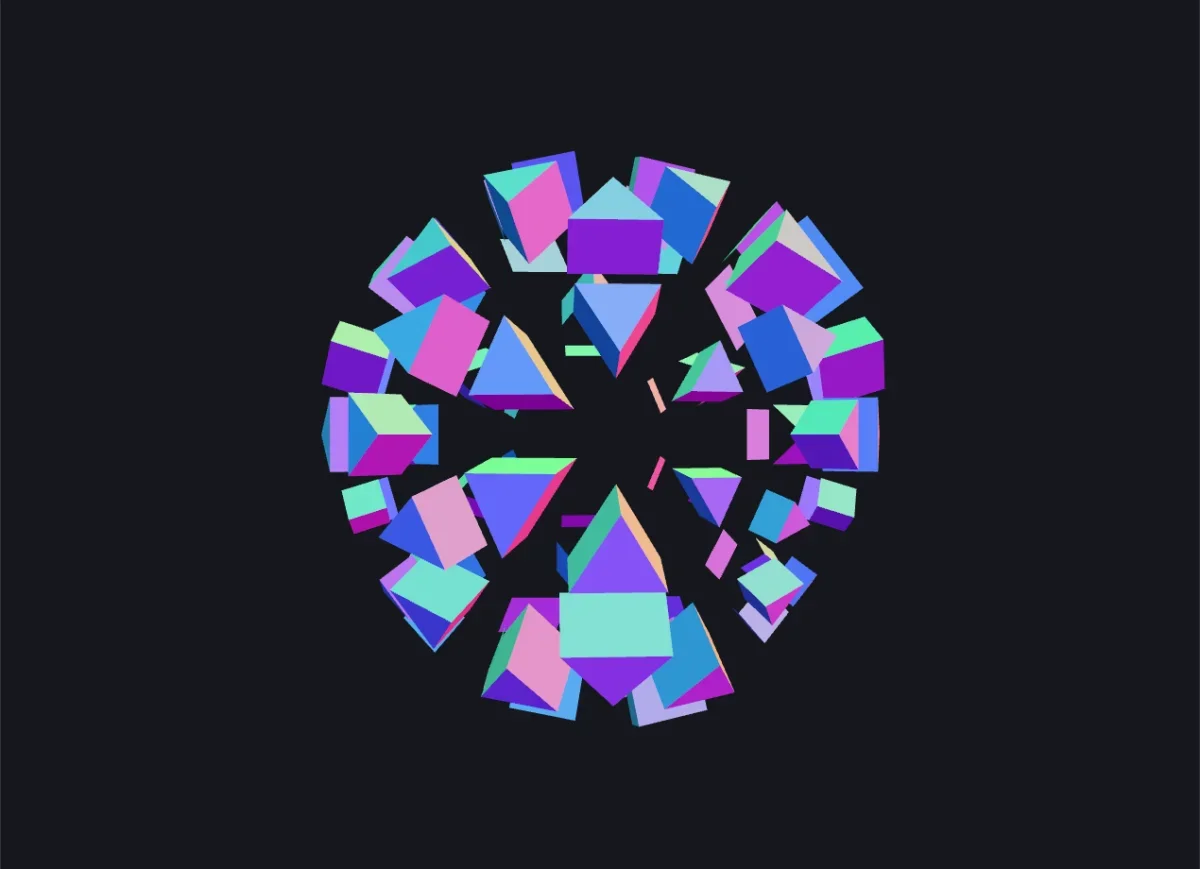
At first glance, one might assume that the instances are missing a face, but that’s not the case.
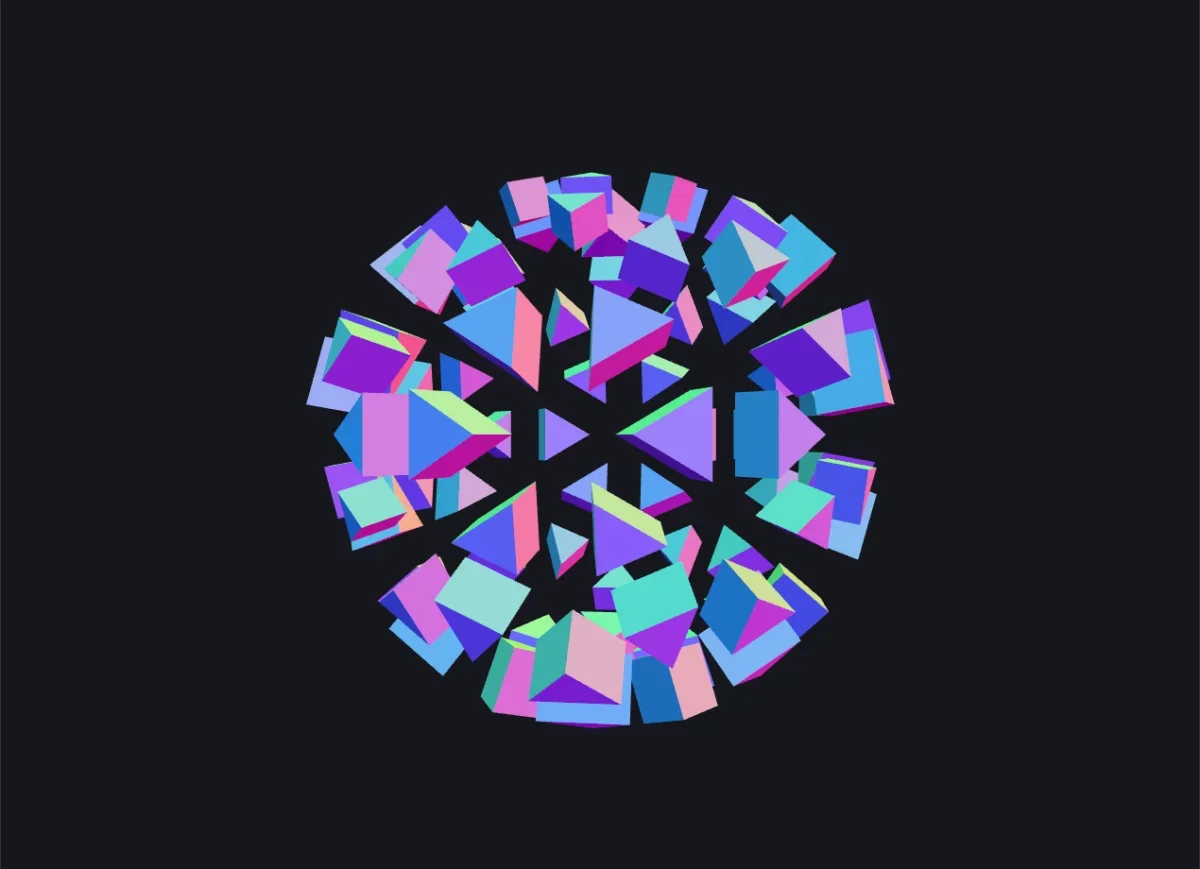
The error lies in the order in which we defined the vertices of that specific face, but the good thing is that the solution is really easy: you just have to swap two vertices, no matter which ones.
This is because the front and back of a face depend on the order in which the vertices are declared: if they are defined clockwise, the face points inward; if they are defined counterclockwise, the face points outward.
// main.js

...

// This is the first face we declare in `attributeArray`
// Change this ...
x1, y1, z1,
x2, y2, z2,
x3, y3, z3,

// ... to this
x1, y1, z1,
x3, y3, z3,
x2, y2, z2,

...
Colors, colors, colors
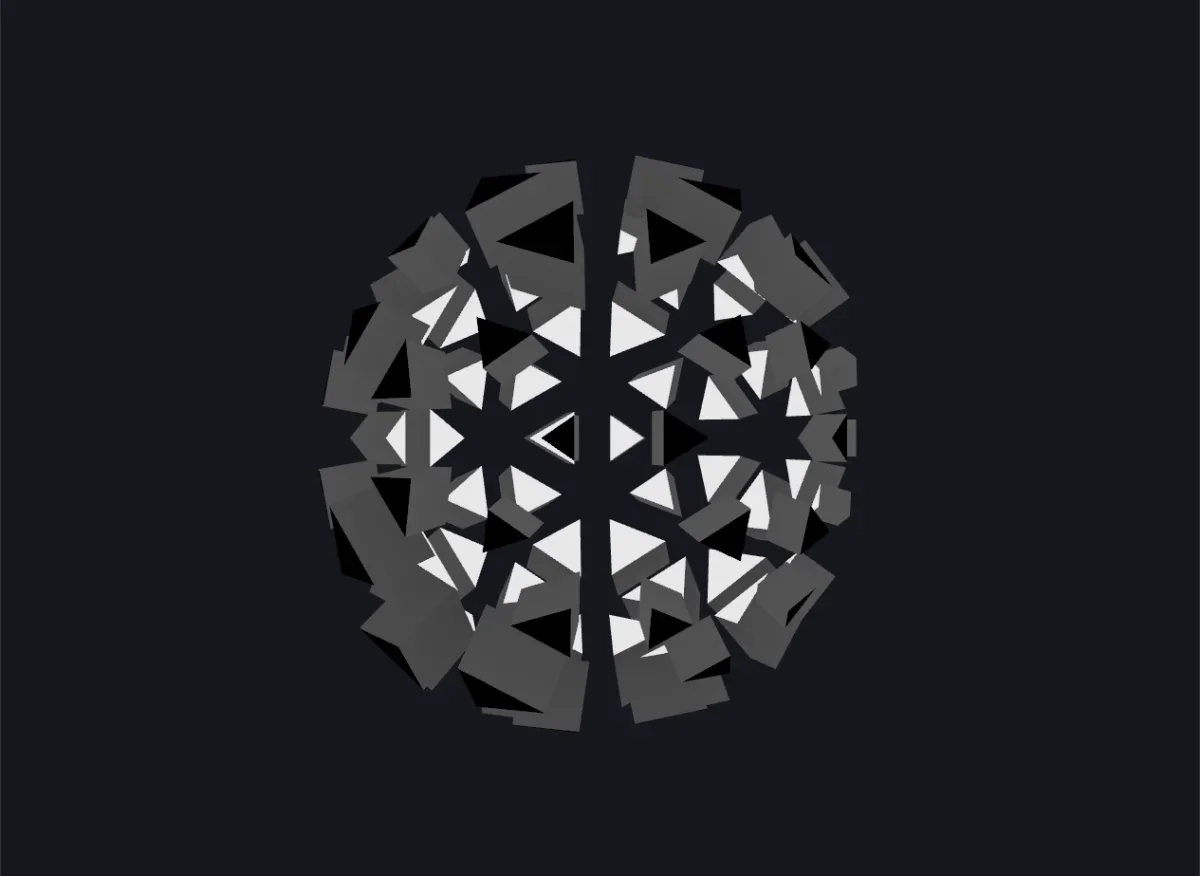
This one is easy. All the instances have basically three colors:
- White for the faces that point towards the center
- Gray(ish) for the faces on the side
- Black for the outer faces
We can manage the color of each face using the dot product. I’m not going to copy-paste the definition of the dot product, but here’s what it does:
- When two normalized vectors face each other, it returns
1 - When they are perpendicular, it returns
0 - When they point to the same direction, it returns
-1
Given this, we can calculate the dot product between each instance normal and a vector that points from the mesh instance to the center, remap it to the range [0, 1] and use this value on a mix function to get the final color:
But before doing that, we must change the type of our ClusterMaterial from MeshNormalNodeMaterial to MeshBasicNodeMaterial, otherwise we won’t be able to change the output color.
// From this ...
import { MeshNormalNodeMaterial } from 'three/webgpu'
export const ClusterMaterial = new MeshNormalNodeMaterial()

// ... to this
import { MeshBasicNodeMaterial } from 'three/webgpu'
export const ClusterMaterial = new MeshBasicNodeMaterial()
Then, import the new modules we need from three/tsl and use them to calculate the colors.
import {
  vec3,
  normalWorld,
  positionWorld,
  mix,
  dot
} from 'three/tsl'

...

// Set the colors.
// `colorA` is the color when the face is facing the center of the mesh.
// `colorB` is the color when the face is facing away from the center of the mesh.
const colorA = vec3(0.8)
const colorB = vec3(0)

// Calculate a normalize vector that goes from the mesh instance to the center of the world.
const toOrigin = vec3(0).sub(positionWorld).normalize()

// Calculate the dot product and remap it to the [0, 1] range.
const dotRemapped = dot(normalWorld, toOrigin).remap(-1, 1, 0, 1)

ClusterMaterial.colorNode = Fn(() => {
  // Mix the colors based on the dot product.
  // The dot product is altered with the smoothstep function only for visual purposes.
  // This way the sides have a darker color.
  return mix(colorB, colorA, dotRemapped.smoothstep(0.35, 0.95))
})()
And here’s the result:
Adding some interaction
Remember that we’re rendering the InnerMaterial on the back faces? Let me tell you why.
For this interaction, we’re going to shoot a ray from the mouse pointer into the scene and then check if we’re hitting the inner mesh. Thanks to the fact that we’re rendering only the inner faces, the ray will be able to hit only them.
Let’s start by hiding our facesMesh:
// main.js

...

// Commenting this line out is enough for the time being
// innerMesh.add(facesMesh)
…and editing the InnerMaterial. As we did before, we’ll have to replace the MeshNormalNodeMaterial with a MeshBasicNodeMaterial.
import { Fn, uniform, vec3, positionWorld, distance } from 'three/tsl'
import { MeshBasicNodeMaterial, BackSide } from 'three/webgpu'

export const InnerMaterial = new MeshBasicNodeMaterial({
  side: BackSide,
  colorWrite: true, // Resume color writing just for testing purposes
  depthWrite: false,
})

export const hoverPointWS = uniform(vec3(0))
export const effectStrength = uniform(0)

// Function to calculate the hover effect based on the position in world space.
// It calculates the distance between the position of each vertex and
// the point in world space where the casted ray hit the mesh,
// clamps it to the range [0, 1], and then applies a smoothstep function to it.
// Finally, it multiplies the result by the effect strength because
// we're going to fade it in/out.
//
// We have to export this function because we're going to use it
// in the ClusterMaterial as well.
export const hoverEffect = Fn(([positionWS]) => {
  return distance(positionWS, hoverPointWS)
          .clamp(0, 1)
          .smoothstep(0.8, 0.2)
          .mul(effectStrength)
})

InnerMaterial.colorNode = Fn(() => {
  return hoverEffect(positionWorld)
})()
If you check the browser window, all you’ll be able to see is a black spinning shape.
That means it’s working.
For the actual interaction logic, we’ll create a brand new three-start component and attach it to our inner mesh.
// behaviors/HoverEffect.js

import { Raycaster, Vector2 } from 'three/webgpu'
import { Object3DBehaviour } from 'three-start'
import { gsap } from 'gsap'
import { Observer } from 'gsap/Observer'

import { hoverPointWS, effectStrength } from '../materials/Inner'

gsap.registerPlugin(Observer)

export class HoverEffect extends Object3DBehaviour {
  ndc = new Vector2()
  raycaster = new Raycaster()

  #isHover = false

  onAwake() {
    this.createPointer()
  }

  createPointer() {
    Observer.create({
      type: 'pointer',
      target: this.ctx.canvasContainer,
      onMove: (event) => {
        const { x, y } = event

        this.ndc.set(
          x / this.ctx.canvasContainer.clientWidth * 2 - 1,
          -(y / this.ctx.canvasContainer.clientHeight) * 2 + 1
        )

        this.raycaster.setFromCamera(this.ndc, this.ctx.camera)
        const hit = this.raycaster.intersectObject(this.object, false)

        this.isHover = hit.length > 0

        if (!this.isHover) return

        gsap.to(hoverPointWS.value, {
          x: hit[0].point.x,
          y: hit[0].point.y,
          z: hit[0].point.z,
          duration: 0.5,
          ease: 'power2.out',
          overwrite: true
        })

      }
    })
  }

  get isHover() {
    return this.#isHover
  }

  set isHover(value) {
    this.#isHover = value

    const effectValue = value ? 1 : 0
    const effectDuration = value ? 0.5 : 0.2

    gsap.to(effectStrength, {
      value: effectValue,
      duration: effectDuration,
      ease: 'power2.out',
      overwrite: true
    })
  }
}
The component does the following:
- On init, it sets up a new GSAP pointer Observer.
- This Observer casts a ray whenever the pointer moves and checks if it collides with the object this component is assigned to (
this.object). - If there’s a collision, the material’s
hoverPointWSuniform value is animated using GSAP to match the current hit point’s coordinates. - Also, the getter/setter on the
#isDebugvariable allows us to “watch” whenever the variable changes and trigger things accordingly. In this case, we’re defining different values and tween durations for the material’seffectStrengthuniform depending on the value the variable changes to.
Now import it into main.js and add it to the inner mesh.
import { HoverEffect } from "./behaviors/HoverEffect"

...

addComponent(innerMesh, HoverEffect)
If you did everything correctly, you should see this:
That means it’s working. Now, before moving on, restore the visibility of both the facesMesh and the colorWrite parameter on the InnerMaterial.
// main.js

...

// Add this back
innerMesh.add(facesMesh)
// materials/Inner.js
...
export const InnerMaterial = new MeshBasicNodeMaterial({
side: BackSide,
colorWrite: false, // set this back to `false` since we must not see the mesh
depthWrite: false,
})Now we can use the hoverEffect function we created in the InnerMaterial inside our ClusterMaterial by simply importing it.
// materials/Cluster.js

import { hoverEffect } from './InnerMaterial'
Playing with scales
We’re going to use the hover effect in two distinct ways. The first one consists of increasing the scale of the instances depending on the intensity of the hover effect.
Edit the ClusterMaterial this way:
import { modelWorldMatrix } from 'three/tsl'

...

// Get the instance centroid coordinates in world space ...
const centroidWS = modelWorldMatrix.mul(centroid)

// ... and use its value to calculate the effect influence.
// We're not using the vertices' position (using `positionWorld`) because
// that way the code will calculate the distance between the origin of the effect
// and each vertex; instead we want the actual distance between the effect origin and
// a single point of each mesh. The centroid in world coordinates.
const hover = hoverEffect(centroidWS)

...

ClusterMaterial.positionNode = Fn(() => {
  const t = time.mul(0.5)

  const noise = mx_noise_float(centroid.yz.add(t))
  noise.remapAssign(-1, 1, scaleMin, scaleMax)

  // Additional scale factor based on the hover effect,
  // remapped to the [0, 0.45] range just not to go too high with the final value
  const scaleByHover = hover.remap(0, 1, 0, 0.45)

  return centroid.add(centered.mul(noise.add(scaleByHover)))
})()
And here’s the result:
Adding the final color twist
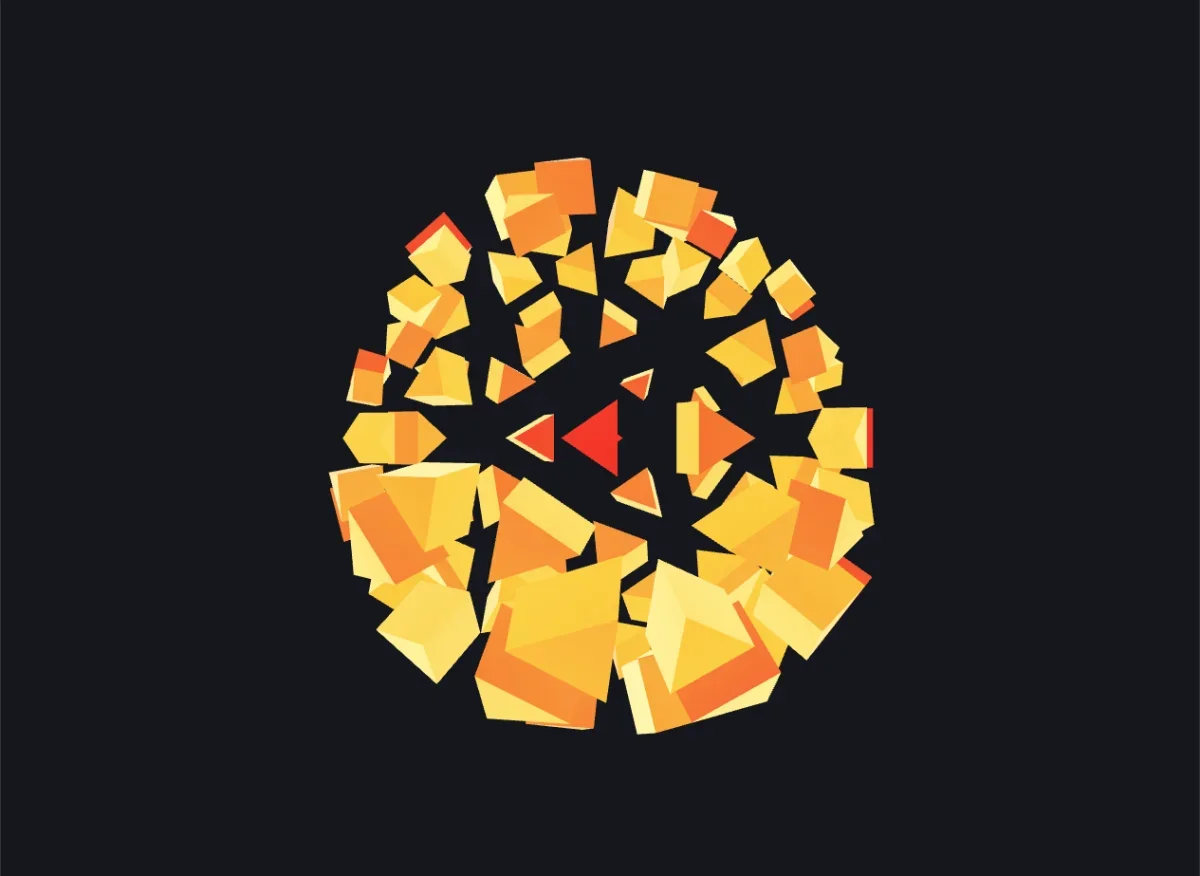
Despite the original work being all black and white, I want the scene to have a bit of color. To do this, we’ll use a simple matcap on the faces, but only where the hover effect has some influence.
The matcap I used comes from this website (Yellow 18), but feel free to use your own.
After placing your matcap file in your static files directory, load it from main.js.
...

const textureLoader = new THREE.TextureLoader()
const matcap = await textureLoader.loadAsync('/yellow-18.png')
matcap.colorSpace = THREE.SRGBColorSpace

...
Now, please follow me.
When we initialize a material that’s supposed to use textures, we cannot simply set them to null or undefined, because this will trigger an error and, in the best-case scenario, we’ll see a black mesh.
We can solve this by using a placeholder texture during the initialization phase and then replacing it once we’ve loaded our final texture.
// materials/Cluster.js

import { DataTexture } from 'three/webgpu',

// These are ADDITIONAL TSL modules needed for this step
import { modelWorldMatrix, uniform, matcapUV, texture } from 'three/tsl'

...

// This is the placeholder texture
const dummyTexture = new DataTexture(new Uint8Array([0, 0, 0, 0]), 1, 1)

// Setting up the uniform and exporting it so we update it in an external file
export const map = uniform(dummyTexture)

...

ClusterMaterial.colorNode = Fn(() => {
  return texture(map.value, matcapUV).toVec3()
})()
If you see everything turn black again but there are no errors in the console, everything works.
Now import the map uniform in main.js and update its value once the texture is loaded.
import { map } from "./materials/Cluster";

...

const textureLoader = new THREE.TextureLoader()
const matcap = await textureLoader.loadAsync('/yellow-18.png')
matcap.colorSpace = THREE.SRGBColorSpace
map.value = matcap // <-- add this
You should now see this rotating spherical cheese.
Finally, refactor the colorNode this way to make the matcap visible only where and when the effect is active:
ClusterMaterial.colorNode = Fn(() => {
  const toOrigin = vec3(0).sub(positionWorld).normalize()
  const dotRemapped = dot(normalWorld, toOrigin).remap(-1, 1, 0, 1)
  const matcap = texture(map.value, matcapUV).toVec3()

  const colAToMatcap = mix(colorA, matcap, hover)

  // Mix the colors based on the dot product.
  // The dot product is altered with the smoothstep function only for visual purposes.
  // This way the sides have a darker color.
  return mix(colorB, colAToMatcap, dotRemapped.smoothstep(0.35, 0.95))
})()
Post-processing
Now that our effect is complete, let’s add a couple of final post-processing effects.
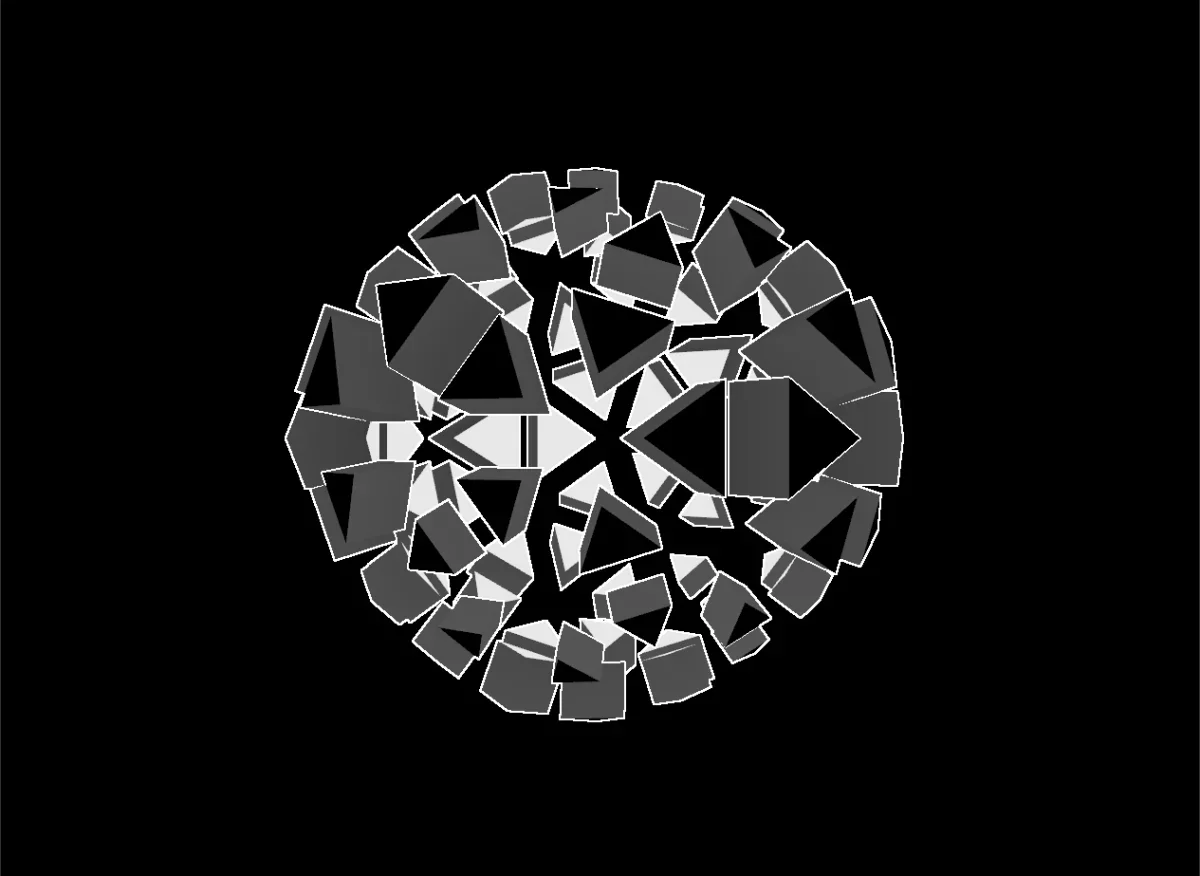
The first one will be the Sobel effect, which will create an outline around the meshes.
// main.js

import { sobel } from 'three/addons/tsl/display/SobelOperatorNode'
import { Fn } from 'three/tsl'

...

// Retrieve the render pipeline and the scene pass from
// the three-start context
const { scene, camera, renderPipeline, scenePass } = starter.ctx

...

// Add some postprocessing effect
const scenePassColor = scenePass.getTextureNode()
const scenePassDepth = scenePass.getTextureNode('depth')

// Create a sobel pass and use the step function to make it sharper
const scenePassSobel = sobel(scenePassDepth)
const sobelPass = Fn(() => {
  return scenePassSobel.step(0.01)
})()

// Create an output pass that adds the sobel pass to the main pass
const outputPass = Fn(() => {
  return scenePassColor.add(sobelPass)
})()

// Then update the outputNode of the render pipeline with out own node
renderPipeline.outputNode = outputPass
You should now see a thick white border around the meshes:
Finally we will apply a dithering post process, and it’s just a matter of very few lines of code:
// main.js

import { bayerDither } from 'three/addons/tsl/math/Bayer'

...

// Refactor the `outputPass` function
const outputPass = Fn(() => {
  const result = scenePassColor.add(sobelPass)

  // Applying dithering to `result`, which already has the sobel effect
  result.assign(bayerDither(result))

  return result
})()
Finally it’s done! (Note that the video quality might hide the dithering effect):
Final words
We finally reached the end. It took me way longer to write this tutorial than it did to actually work on the effect.
If you still haven’t, I encourage you to give TSL a try. The syntax might be a bit intimidating at first, but once it clicks, it becomes a valuable tool to work with, especially because all the uniforms and functions are treated as nodes that you can import and use as simple JavaScript modules.
The same thing goes for three-start. For me, it was a real game changer because it helps split the code and encapsulate every single behavior, like we did in this tutorial.
Ciao!
Credits
- polyhop on Instagram
- ThreeJS
- three-start
- The mighty GSAP and its team
- Cosmic Shelter and their matcaps